Thursday, July 22, 2010

Easy Fabric Headband Tutorial

I love head bands. I love coordinating them with all different kinds of out fits and, I love putting them on my girls too. I don't like spending a lot of money for them so I usually end up making my own.
This easy pattern is perfect for using up your long skinny, what do I do with this, there's not enough to do much with, but too much to throw away scraps of fabric.
Lets get started.
What you'll need.

  • Fabric, 18 x 2.5 inches (you can adjust this and make it wider if you want)

  • Interfacing, slightly smaller than 18 x 2.5 inches (slightly = 1/16 smaller all the way around)

  • Two 12 inch lengths of 3/8 inch wide grosgrain ribbon

  • Thread (matching, coordinating or contrasting) (I show white in the picture but I decided to use contrasting brown to go with the ribbon)

  • Sewing Machine

  • Scissors

  • Pinking sheers (optional)

  • Straight Pins

  • Iron
Method:
Apply interfacing to the wrong side of your fabric strip. (help with interfacing here)
Fold the fabric strip in half length-wise, wrong sides together, ie. the colorful part of the fabric is out.
Press well with your iron with steam. Really make I nice tight crease.
Open up your strip of fabric and fold the raw edge of one of the long sides of the fabric into the center crease.

Press again with your iron making it a nice and crisp fold.
Flip your strip of fabric over and fold the other long edge into the center.

Making sure your two folded edges are even,
Press again. You should have a strip of fabric approximately 2/3 of an inch across.
Open up one of the ends of you fabric strip and place one of the ribbons inside about 1 inch.
Pin in place.
*Optional: Right before you pin the ribbon in you can use your pinking sheers to trim the raw edges on the end. These edges will remain unfinished.
Repeat on the other side.
Now you're ready to sew.
The sewing we'll be doing is considered topstitching.
My secret to making my top stitching look a little more professional is to make my stitch length longer.
Average stitch length is about a 2. When I'm topstitching I set my length between 3 and 4.
For this project I set my length at 4 and moved my needle all the way to the right.
I used the edge of my pressure foot (1/4" seam guide) to line up the edge of the fabric.
Doing this though, you're actually stitching in a 1/8 inch seam because the needle has been moved all the way to the right.
Moving the needle makes it easier to get a very narrow seam and still be able to guide your fabric through.
Stitch down one long side and then the other.
Make sure you back stitch at the beginning and end of each line of stitching.
Stitch across the ends securing the ribbon.
For this I wanted the stitching tighter to hold the ribbon so I lowered my stitch length to 2 again.
Sew with the needle in the far right position and then again with the needle in the center position.
Doing this secures the ribbon even more.
Trim all of your threads and finish your ribbon ends (if desired) by using glue, heat sealing with a candle or dipping them in a dab of fabric glue.
And you're done!!!
The perfect little tie underneath, so comfortable you can wear it all day headband.
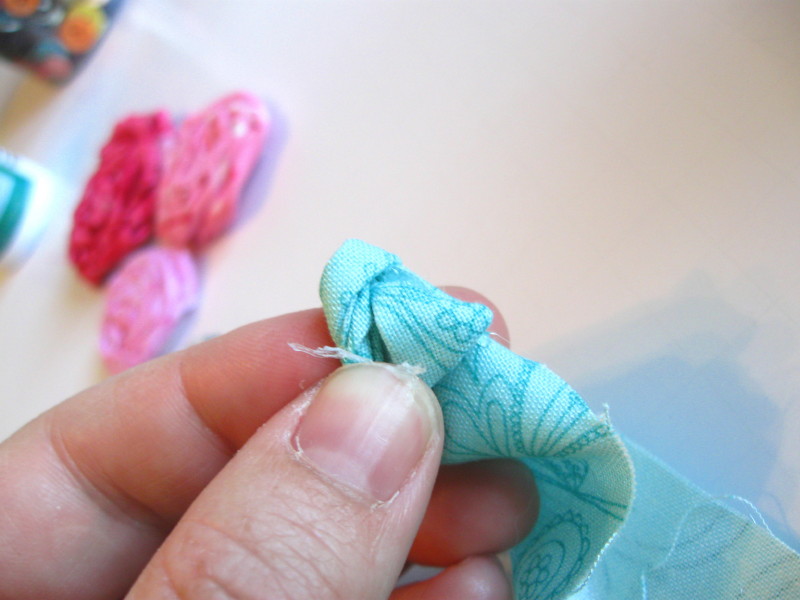
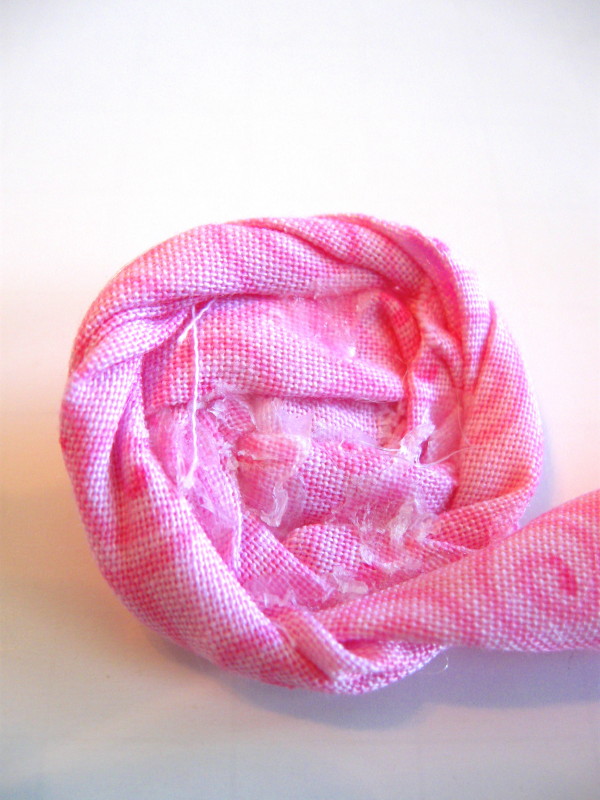
You can either pin, clip or sew on one of your twisted fabric flowers from this tutorial
Another option!
If you don't like the tie and prefer a traditional stretchy headband you can use this pattern for that to.
Omit the ribbon.
Use an hair elastic and simply clip it.
You will have to do a little measuring.
I measured my head where I wanted to wear the headband (23 inches gigantic I know).
I wanted my headband to be 1/2 - 1 smaller than my head so it would be just a little tight.
My elastic when cut open measured 5 inches.
My fabric strip was 18 inches, so I didn't need to trim anything.
Sew down the two long sides of the folded fabric strip.
Insert your elastic into the fabric about 1/2 inch.
Lower your stitch length to a couple of notches less than 2.
Sew your ends making sure to backstich and catch the elastic.
I ended up sewing back and forth over the elastic 3 or 4 times just to make sure the elastic would hole.
(please forgive the weird color on these last pics. That's what happens when you take them at 10pm!:))

There you have it! Easy Peazy fabric headband!
Now go sew and enjoy!!!


This pattern/tutorial is for private use only. Thank you.


Thursday, July 15, 2010

Understanding Preschool Boy Speak, I mean Language!

I've been a mother now for 13 & 3/4 years, plus I have three boys. So I thought I might impart to you a little I've learned about The Preschool Boy.


It occurred to me that just when you start to get the whole toddler thing down, I mean just when you're really understanding what they need from you and what you need to do to avoid the ill-timed, embarrassing melt-down, they turn into a preschooler. A whole new species in and of its self. A bizarre sort of creature these preschoolers. For example they have mastered quite a bit of the English language. Their language skills are starting to become more evident but their language application quite often is muddled and hard to understand. It's important to know that miss-interpreting a preschooler can be as fatal as giving a toddler their blue sippy-cup when they wanted the green one because it's their favorite as of 2 seconds ago and they failed to let you know, or giving them Goldfish crackers when they wanted a Ritz ----- deadly! In order to be a happy successful parent to a preschooler it's vital that you not take what they say too literally, also knowing what they were doing precisely before they spoke to you is invaluable.

Lets take a look at some real examples of Preschool Speak and their translations. Shall we?

No creations on T.V.
I knew he had just been watching Curious George on PBS.

Translation: Mother, will you please turn the captions off on the television. The words are getting in the way of the picture.

Vanilla Wipe-Outs please?
It was snack time

Translation: I'm rather hungry mother and would like a snack. I think Nilla-Wafers would satisfy my hunger. May I please have some?

I don't want Little Mermaid show - too girly.
I knew he didn't like it the first time he watched but I thought I'd ask anyway.

Translation: I really don't want to watch that show again because the main person is a girl who sings and dances and I don't know if you've noticed mom but I'm a guy's guy. I want a show with action and adventure, if something blows-up even better. Plus, in Little Mermaid there's that Sea Witch and she really creeps me out.

My arms are broken.
Now this one is a little tricky because his arms could actually be broken. The key is to note the tone in which this is spoken i.e. is he screaming in pain? or did he just say it with maybe a hint of whining? Also it's of the utmost importance to know what he was doing right before he said this to you. In this particular instance he wanted to go outside and was trying to put on his jacket.

Translation: Dad's already outside and I don't want to be left behind. Please help me with my jacket because the arms are inside-out.

I hope that this may help in some small way as you try to navigate your way through the preschool years. If this doesn't help and your preschooler is having way too many moments of frustration from your lack of understanding his communication you can always resort to my old stand-by for a few moments of distraction and relief for/from your preschooler. Give him some goldfish crackers, a Capri-sun and turn on a non-girly show. This is probably what he was trying to tell you he wanted anyway.;)

Chocolate Cream Cheese Cake


Chocolate Cream Cheese Cake


Filling
1- 8 ounce package cream cheese, softened
1/4 Cup sugar
2 Tablespoons butter or margarine, softened
1 Tablespoon cornstarch
1 Egg
2 Tablespoons Milk
3/4 teaspoon vanilla

Cake
1 Package Devil's food cake mix
1 Cup water
1/3 Cup Vegetable oil
3 Eggs

Chocolate Topping
2/3 Cup Semi-sweet chocolate chips
2/3 Cup heavy cream
1/2 teaspoon vanilla

White Chocolate Drizzle
2 ounces white chocolate
2 teaspoons vegetable oil
1/4 teaspoon vanilla

Preheat oven to 325 degrees. Spray Fluted or Bundt Pan with nonstick cooking spray.

For filling, beat cream cheese, sugar, butter and cornstarch until well blended, Add egg, milk and vanilla, Mix until smooth; set aside.

For Cake, combine cake mix, water, oil and eggs; mix according to package directions.
Spread 1 1/2 C. cake batter evenly in pan. Spread evenly with filling. Slowly pour remaining cake batter over filling. Bake 55-65 min. (It consistently takes exactly 60 min for me.) Cool in pan 10 minutes. Loosen cake from edge and center of pan. Invert on cake plate.

For glaze, place chocolate and vanilla in a medium bowl. Bring cream to a boil over high heat, strain while pouring over chocolate. Let set for 5 minutes. Stir, it will look waxing and chunky but keep stirring it will become smooth shortly. Let set and cool 8-10 minutes or until chocolate falls in ribbons from spoon. After cake has cooled spoon onto cake letting the chocolate drip over the sides. Let chocolate cool and set-up

For drizzle, Microwave white chocolate and oil on high for one minute. Stir until smooth. Spoon into a Ziploc bag. Snip a small hole in one corner of bag and drizzle the white chocolate over the cake.

Refrigerate 15 minutes.

Yield approx. 16 servings.

Notes: I rarely make the white chocolate drizzle for two reasons 1) I usually don't have white chocolate on hand. 2) It's just, more work and the cake is still delicious without it.

It does make it look really good though.

I think you could replace the vanilla with other flavors of extracts like: lemon, mint, orange, etc.

The cake is great with canned cherry pie filling and I would think also with other fruit toppings.

Lets face it chocolate tastes great with EVERYTHING!!!!!!!

As my daughter said, "Forget love! I'd rather fall in chocolate!"

Wednesday, July 14, 2010

Twisted Fabric Flower Tutorial

These twisted fabric flowers are everywhere right now. And why not? They are so easy and quick to make and can be made completely needle and thread free.
I had a friend ask how I made my twisted fabric flowers for my daughter on this post.
So I thought I'd try my hand at a tutorial.
I'm going to be showing some painfully close close-ups of my un-manicured fingers. Please try your hardest to just ignore and not get sick. Please?!

Materials
  • Strips of fabric 1.5" to 2" by at least 18" long
  • Felt scraps
  • Scissors
  • Hot Glue Gun and Hot Glue Sticks
Optional
  • Coordinating Needle and thread
  • Coordinating Button
  • Pin Back
  • Alligator Clip
Let's get started!!!

I start by folding the end of the fabric in half.

And then fold it in half again. Stick a small dab of hot glue in between your fabric layers to help keep it together.

Fold the end down and slightly to the side and then fold again to make a very small triangle.
Hold with a small dab of hot glue.
This will be your center.
I think this is the trickiest part of the whole process. Lets see it again with some blue fabric so you can get a little bit better idea what I'm talking about.
From here you start to twist the fabric slightly and secure with small dabs of hot glue as you wrap the fabric around.
I prefer to twist the fabric toward me and toward the flower but I've done it both ways and they both work well. I just like the way it looks by twisting the fabric toward me.

I glue the fabric slightly behind the previous row but you can wrap it slightly in front or slightly behind.
Just experiment as you go. Don't be afraid mess up you can always try another.
The thing is these aren't supposed to look perfect so don't worry if yours isn't perfectly symmetrical.
Here's the back view.
When you get your flower the width you like trim your fabric about an inch from your flower at a slight angle.
Wrap your end around the back and glue.
Cut a circle from you felt and glue to the back of your flower to give it a little more stability.
From here you can stitch or glue on a pin back or alligator hair clip.
Also you can embellish it a bit with a coordinating button in the center.

These are so much fun on purses, T-shirts, or on an headband......the possibilities are endless!
If you have any questions feel free to leave me a comment and I'll try my best to clarify.
Enjoy!!!

Tuesday, July 13, 2010

Meet George

Meet George!
He's a purple, furry, one eyed, alien octopus.
He even has eight tentacles.
He was dreamt up (in paper form) by my second son.
And created by the two of us this past week.
He's extremely soft and cuddly and fun to hold......even if his fur does make me sneeze my head off....
My son says that's one of George's defense mechanisms.
Sneeze attack!
But other than that he's very friendly.
The little green army men weren't so sure though.
We were afraid there was going to be an explosive battle right here in our living room.
There could have been purple fur and green plastic every where.
Luckily George had his faithful friend, Monkey (a.k.a. King Kong), to stand up for him, introduce him and set those trigger happy green army men strait!
He's FRIENDLY!!!

And photogenic!!!!
Every house should have one.


The rest of the story.
George was a great idea I had two years ago......um yep I said two years ago.
This particular son of ours is an artist and a creator. We have stacks and stacks, books and books of his sketches and creations. I thought it would be fun to bring one of his monsters to life for him for his birthday.
But I didn't get it done in time for his birthday so I gave him the fabric and told him what my plans were for it.
Fast forward two years and I still haven't made his alien monster.....I know mother of the year right here.
He started carrying the plastic bag around with the fabric in it last week. Not saying much about it just carrying it around.
So I decided it was finally time to follow through.
We sketched out a pattern.
He helped me cut it out.
He stood by my side while I sewed.
He turned it right side out, filled the tentacles with rice and stuffed the head, watched me stitch it closed and then he helped with the button eye.
It's not the most wonderful stuffed animal the world has ever seen.
But, I'm pretty sure right now, to him, it is.


Sunday, July 11, 2010

Summer Fun SKIRTS

Approximately once every other year or so I concoct a plan that turns out just as I'd hoped or maybe even better. This week our niece K- spent a few days with us and I thought it would be fun to teach Banana and K- how to sew themselves a skirt.
I took them to the fabric store and they were able to find some fabric they both liked. (Miracle of Miracles because I only had one coupon and I hate to buy fabric at regular price!)
I helped them each make a custom pattern, cut out their skirt and sew them up.
I should have taken pictures of the process....but I didn't....I guess I was a little busy.
Of course Sweet Cheeks wanted a skirt too. Luckily there were some pretty good size chunks of fabric left over so I was able to make her one too.
And some twisted fabric flower pins for her shirt.
Today my girls got to wear their new skirts to church and afterward they obliged me and my need to photograph their cuteness!


What do you think?
Pretty darn cute if I do say so myself.
And of course I had to take a picture because it's going to be at least two years before one of my plans works out this well again.

I'm going to try really hard to come up with a tutorial for the gathered tiered skirt (top pic).
I know I've said that before but this time I really mean it!!!

Friday, July 9, 2010

Amy Butler Diaper Tote and Changing Pad, a new twist on an old favorite


Who knows why it's taken me so long but it has, I've had this Amy Butler fabric forever and the design for the new diaper tote has been rattling around in my brain almost as long as I've had the fabric.
But finally, finally, the two, the fabric and the design, have come together and I think they compliment each other rather nicely. If I do say so myself.

So, what's new about this tote? It's the strap! It does double duty. It holds your diapers, wipes and changing pad in but it also works great as a handle. Grab and go or snap it on the handle of your stroller or baby carrier and take it with you, hands free! It doesn't get much better than that.
The fabric is Amy Butler, Morning Glory in Slate and AB Full Moon Dot.  Perfect for a boy or a girl!
I adore Amy Butler fabric. When ever I get to use it I smile.

I'm planning on making more of this style in other fun fabrics soon. Keep your eye on the shop for more in the near future!