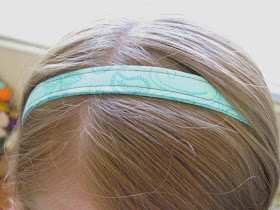
I love head bands. I love coordinating them with all different kinds of out fits and, I love putting them on my girls too. I don't like spending a lot of money for them so I usually end up making my own.
This easy pattern is perfect for using up your long skinny, what do I do with this, there's not enough to do much with, but too much to throw away scraps of fabric.
Lets get started.
What you'll need.
Fabric, 18 x 2.5 inches (you can adjust this and make it wider if you want)
Interfacing, slightly smaller than 18 x 2.5 inches (slightly = 1/16 smaller all the way around)
Two 12 inch lengths of 3/8 inch wide grosgrain ribbon
Thread (matching, coordinating or contrasting) (I show white in the picture but I decided to use contrasting brown to go with the ribbon)
Sewing Machine
Scissors
Pinking sheers (optional)
Straight Pins
Iron
Method:
Apply interfacing to the wrong side of your fabric strip. (help with interfacing here)
Fold the fabric strip in half length-wise, wrong sides together, ie. the colorful part of the fabric is out.
Press well with your iron with steam. Really make I nice tight crease.
Open up your strip of fabric and fold the raw edge of one of the long sides of the fabric into the center crease.
Press again with your iron making it a nice and crisp fold.
Flip your strip of fabric over and fold the other long edge into the center.
Making sure your two folded edges are even,
Press again. You should have a strip of fabric approximately 2/3 of an inch across.
Open up one of the ends of you fabric strip and place one of the ribbons inside about 1 inch.
Pin in place.
*Optional: Right before you pin the ribbon in you can use your pinking sheers to trim the raw edges on the end. These edges will remain unfinished.
Repeat on the other side.
Now you're ready to sew.
The sewing we'll be doing is considered topstitching.
My secret to making my top stitching look a little more professional is to make my stitch length longer.
Average stitch length is about a 2. When I'm topstitching I set my length between 3 and 4.
For this project I set my length at 4 and moved my needle all the way to the right.
I used the edge of my pressure foot (1/4" seam guide) to line up the edge of the fabric.
Doing this though, you're actually stitching in a 1/8 inch seam because the needle has been moved all the way to the right.
Moving the needle makes it easier to get a very narrow seam and still be able to guide your fabric through.
Stitch down one long side and then the other.
Make sure you back stitch at the beginning and end of each line of stitching.
Stitch across the ends securing the ribbon.
For this I wanted the stitching tighter to hold the ribbon so I lowered my stitch length to 2 again.
Sew with the needle in the far right position and then again with the needle in the center position.
Doing this secures the ribbon even more.
Trim all of your threads and finish your ribbon ends (if desired) by using glue, heat sealing with a candle or dipping them in a dab of fabric glue.
And you're done!!!
The perfect little tie underneath, so comfortable you can wear it all day headband.
You can either pin, clip or sew on one of your twisted fabric flowers from this tutorial
Another option!
If you don't like the tie and prefer a traditional stretchy headband you can use this pattern for that to.
Omit the ribbon.
Use an hair elastic and simply clip it.
You will have to do a little measuring.
I measured my head where I wanted to wear the headband (23 inches gigantic I know).
I wanted my headband to be 1/2 - 1 smaller than my head so it would be just a little tight.
My elastic when cut open measured 5 inches.
My fabric strip was 18 inches, so I didn't need to trim anything.
Sew down the two long sides of the folded fabric strip.
Insert your elastic into the fabric about 1/2 inch.
Lower your stitch length to a couple of notches less than 2.
Sew your ends making sure to backstich and catch the elastic.
I ended up sewing back and forth over the elastic 3 or 4 times just to make sure the elastic would hole.
(please forgive the weird color on these last pics. That's what happens when you take them at 10pm!:))
There you have it! Easy Peazy fabric headband!
Now go sew and enjoy!!!
This pattern/tutorial is for private use only. Thank you.


cute! I think I might try some of those. Now I just need the tutorial on how to do the rosette!
ReplyDelete