
These twisted fabric flowers are everywhere right now. And why not? They are so easy and quick to make and can be made completely needle and thread free.
I had a friend ask how I made my twisted fabric flowers for my daughter on this post.
So I thought I'd try my hand at a tutorial.
I'm going to be showing some painfully close close-ups of my un-manicured fingers. Please try your hardest to just ignore and not get sick. Please?!

Materials
- Strips of fabric 1.5" to 2" by at least 18" long
- Felt scraps
- Scissors
- Hot Glue Gun and Hot Glue Sticks
- Coordinating Needle and thread
- Coordinating Button
- Pin Back
- Alligator Clip

I start by folding the end of the fabric in half.

And then fold it in half again. Stick a small dab of hot glue in between your fabric layers to help keep it together.

Fold the end down and slightly to the side and then fold again to make a very small triangle.
Hold with a small dab of hot glue.

This will be your center.
I think this is the trickiest part of the whole process. Lets see it again with some blue fabric so you can get a little bit better idea what I'm talking about.


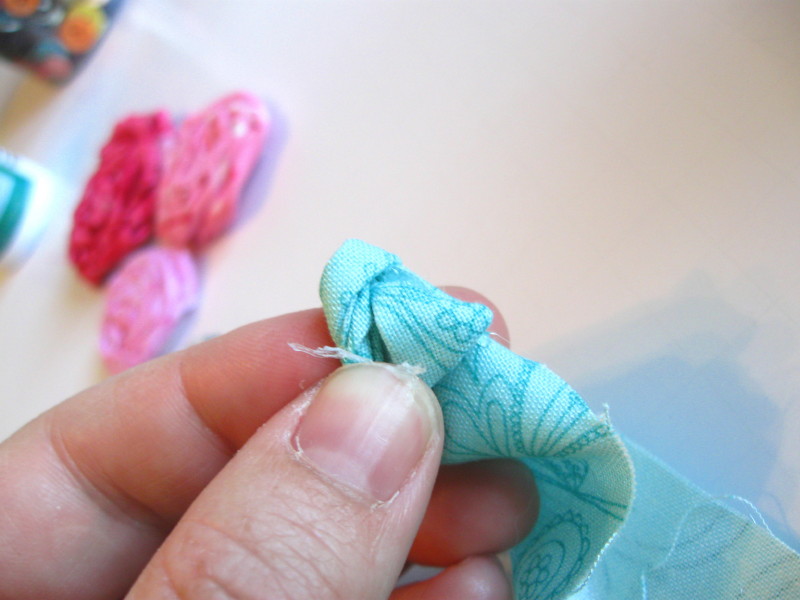
From here you start to twist the fabric slightly and secure with small dabs of hot glue as you wrap the fabric around.

I prefer to twist the fabric toward me and toward the flower but I've done it both ways and they both work well. I just like the way it looks by twisting the fabric toward me.

I glue the fabric slightly behind the previous row but you can wrap it slightly in front or slightly behind.
Just experiment as you go. Don't be afraid mess up you can always try another.
The thing is these aren't supposed to look perfect so don't worry if yours isn't perfectly symmetrical.

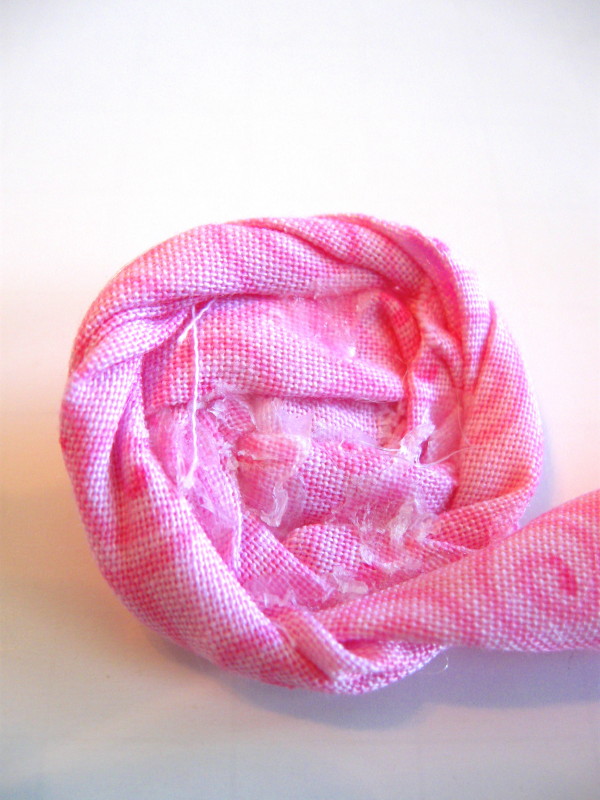
Here's the back view.

When you get your flower the width you like trim your fabric about an inch from your flower at a slight angle.

Wrap your end around the back and glue.

Cut a circle from you felt and glue to the back of your flower to give it a little more stability.
From here you can stitch or glue on a pin back or alligator hair clip.
Also you can embellish it a bit with a coordinating button in the center.
These are so much fun on purses, T-shirts, or on an headband......the possibilities are endless!
If you have any questions feel free to leave me a comment and I'll try my best to clarify.
Enjoy!!!
6 comments:
Thanks for this tutorial! I've been seeing these everywhere. Might try this out tonight after I put my little ones to sleep. By the way, found you through craftgawker.
Cute and simple! I found this post through Pinterest and am now following your blog :) Thank you for a wonderful tutorial.
I would love to print this as a pass-around instruction sheet for our fabric flower super saturday craft day at church, but can't figure out how. Please help! Thanks
I'm going to try this tonight! Great step by step
Awesome! Thanks for the tutorial, very helpful indeed. I HOPE to make some to attach to my daughters very plain backpack.
What a great tutorial. Thanks for sharing with us all. dressmaking fabric
Post a Comment