I don't fancy myself a decorator by any means. But I'm still plugging away at my living room.
I thought I'd share the project I tackled today.
Because I'm a little impatient and because I'm a little excited I'm sharing this before I'm completely finished. I still need to get a mat for it. But you understand right?
And just so you know....the frame I'm using was purchased.....ah-hum....5 years ago, to make a button wreath Christmas wall hanging....it sat for a couple of years in my closet waiting, patiently waiting to be used. Then it sat in a box for 3 years silently lamenting it's potential gone to waste. But now here it is! in all it's glory, the perfect compliment to my button monogram. Hurrah!!
What you'll need:
Buttons (Lots and Lots of various sizes)
Background fabric (my frame was 12 x 12 so I cut my fabric 15 x 15 so I would have enough fabric to wrap around the back and secure it.)
Frame (no glass needed), backing
Cardboard or poster board cut to fit inside frame -- or you could use the glass from your frame as the insert (Just an idea!)
Spray adhesive
Masking tape
fabric glue (clear drying)
Pencil, Paper
What you do:
Probably best to have your frame and matte before you begin.
On a large piece of paper draw out the dimensions of your frame and matte. Mark your center point.
Either sketch out your letter or print your letter from your computer.
I went with sketching as you can see.
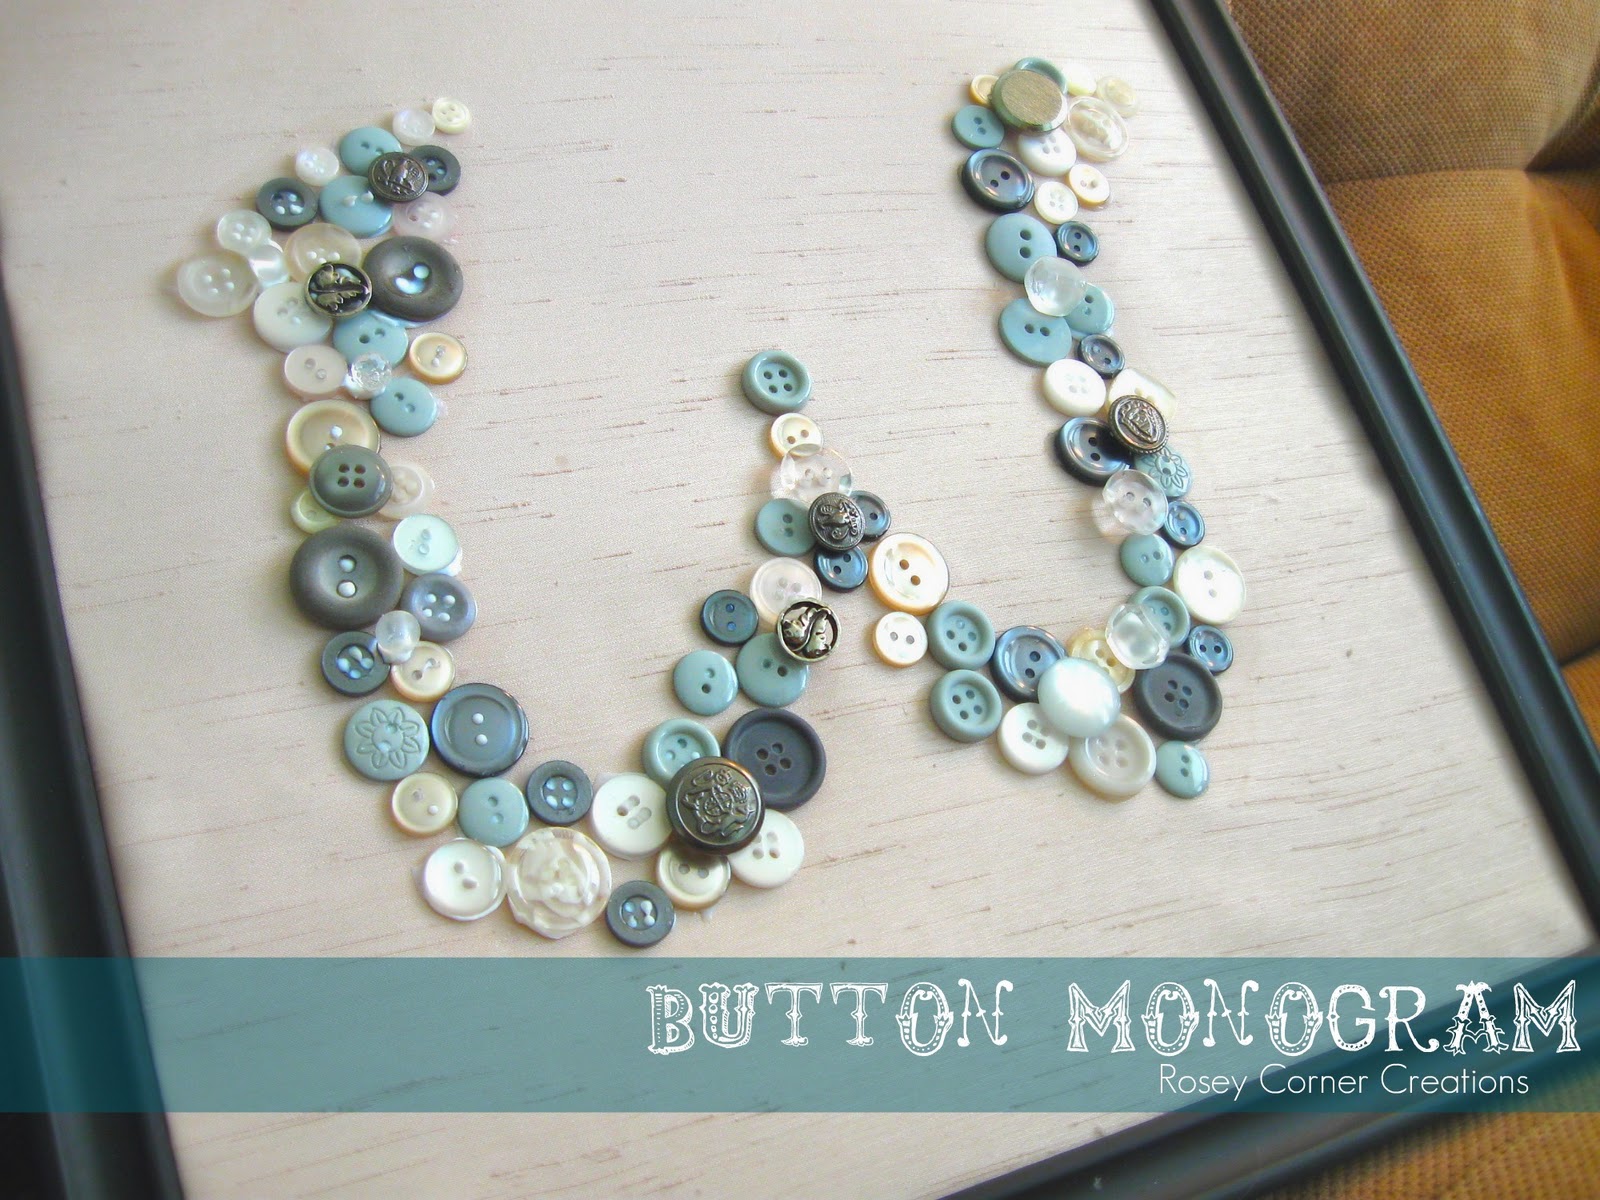
Sort out your buttons and begin laying them out along your outline,
What I think makes this project look really great is to have the buttons close and different sizes of buttons filling in gaps.
I even layered a few.
I had some buttons with shanks that I stuck in small gaps so the buttons were above the other buttons.

Backing:
Find the center of your fabric piece, mark it on the wrong side with a small dot using a pencil.
Find the center of your cardboard insert, mark it with a small dot using a pencil.
Spray the cardboard with spray adhesive following the instructions on the can.
Place the center of your fabric on the center of the cardboard.
Use your hands to smooth the fabric out from the center so you don't have any gaps or air bubbles.

Use masking tape to secure your fabric on the back of the cardboard. My 4 year old was very helpful with this part.
Pretty isn't it?

With your backing flat apply a little fabric glue to the back of each button and then place it on the fabric. Starting with the center and working out.
You can do this a couple of ways.
- Working from your paper move one button over at a time. or
- Transfer all of the buttons over, make sure your monogram is the way you want it and then glue each button down.
I did the second one.
I thought about sewing each one one, which would look pretty classy but too labor intensive for me.
Also, I considered using hot glue but then I didn't want to have to deal with all of the glue strings.
So permanent fabric glue is what I ended up using.

Let dry, then insert in your frame and enjoy.
I'll update pics when I get it all finished.

Good luck and enjoy!
Let me know if you have any questions.
Update:
It's finished and hung! I love the way it turned out!


2 comments:
looks great - thanks for sharing! i hope to try to make one this fall.
I am going to make one of these. LOVE it. Nice tutorial!!
Post a Comment