
Well, it's only been what? A month since I was going to post this. And now it's past Christmas and who needs a tutorial on how to make a stocking ----- after Christmas?
If I could only tell you the heavy that's been going on around here.
Let me just say this.
I'm ready for 2012! I'm ready to say good bye to 2011 and hello to the possibility of an amazing new year.
Anyway, with the heavy and hard has been a lot of happy, so, all is well.
So what about this tutorial?
It's a stocking.
So what?! you may be saying.
Well, I just thought it would be nice to post a few instructions for constructing a basic stocking.
Then next year when it gets close to Christmas or even if you decide to do a Christmas in July Craft-a-thon this little tutorial will be here for you.
See...I've got your back.
So here's my stocking story.
Six years ago (I think) I decided to make new stockings for our family. Up until that point they'd been kind of hodge-podge and I thought it'd be nice to have coordinating stockings to hang by the fire (with care).
I took my little ones with me to the store (at the time I had 4) and I let them help pick out the fabric.
I made a pattern by tracing around an existing stocking and I went for it.
When they were finished I was happy, the kids were happy, the husband was happy....it was a happy house.
I had some fabric left over and I decided to save it just in case another little one came along and needed a stocking too.
She ended up coming along the next Christmas but I didn't get around to making her a stocking.
Fast forward 5 years and she's been using one of the hodge-podge stockings all this time.
This year she put her foot down and said she needed a stocking that matched everyone elses.
I pulled out the box with the fabric and 30-45 minutes later she had a stocking!
And it matches everyone elses!
Yipee! She's so happy.
Do you want to make one too?
What you'll need
1/2 yard, main fabric - cotton
1/2 yard, lining, pre quilted cotton
1/4 yard, cuff and loop cotton
straight pins
thread
scissors
sewing machine
iron
I'm sorry I'm not going to provide a pattern but you can easily make your own by tracing an existing stocking.
When you trace the stocking add 1/4 - 1/2 inch all the way around for a seam allowance.
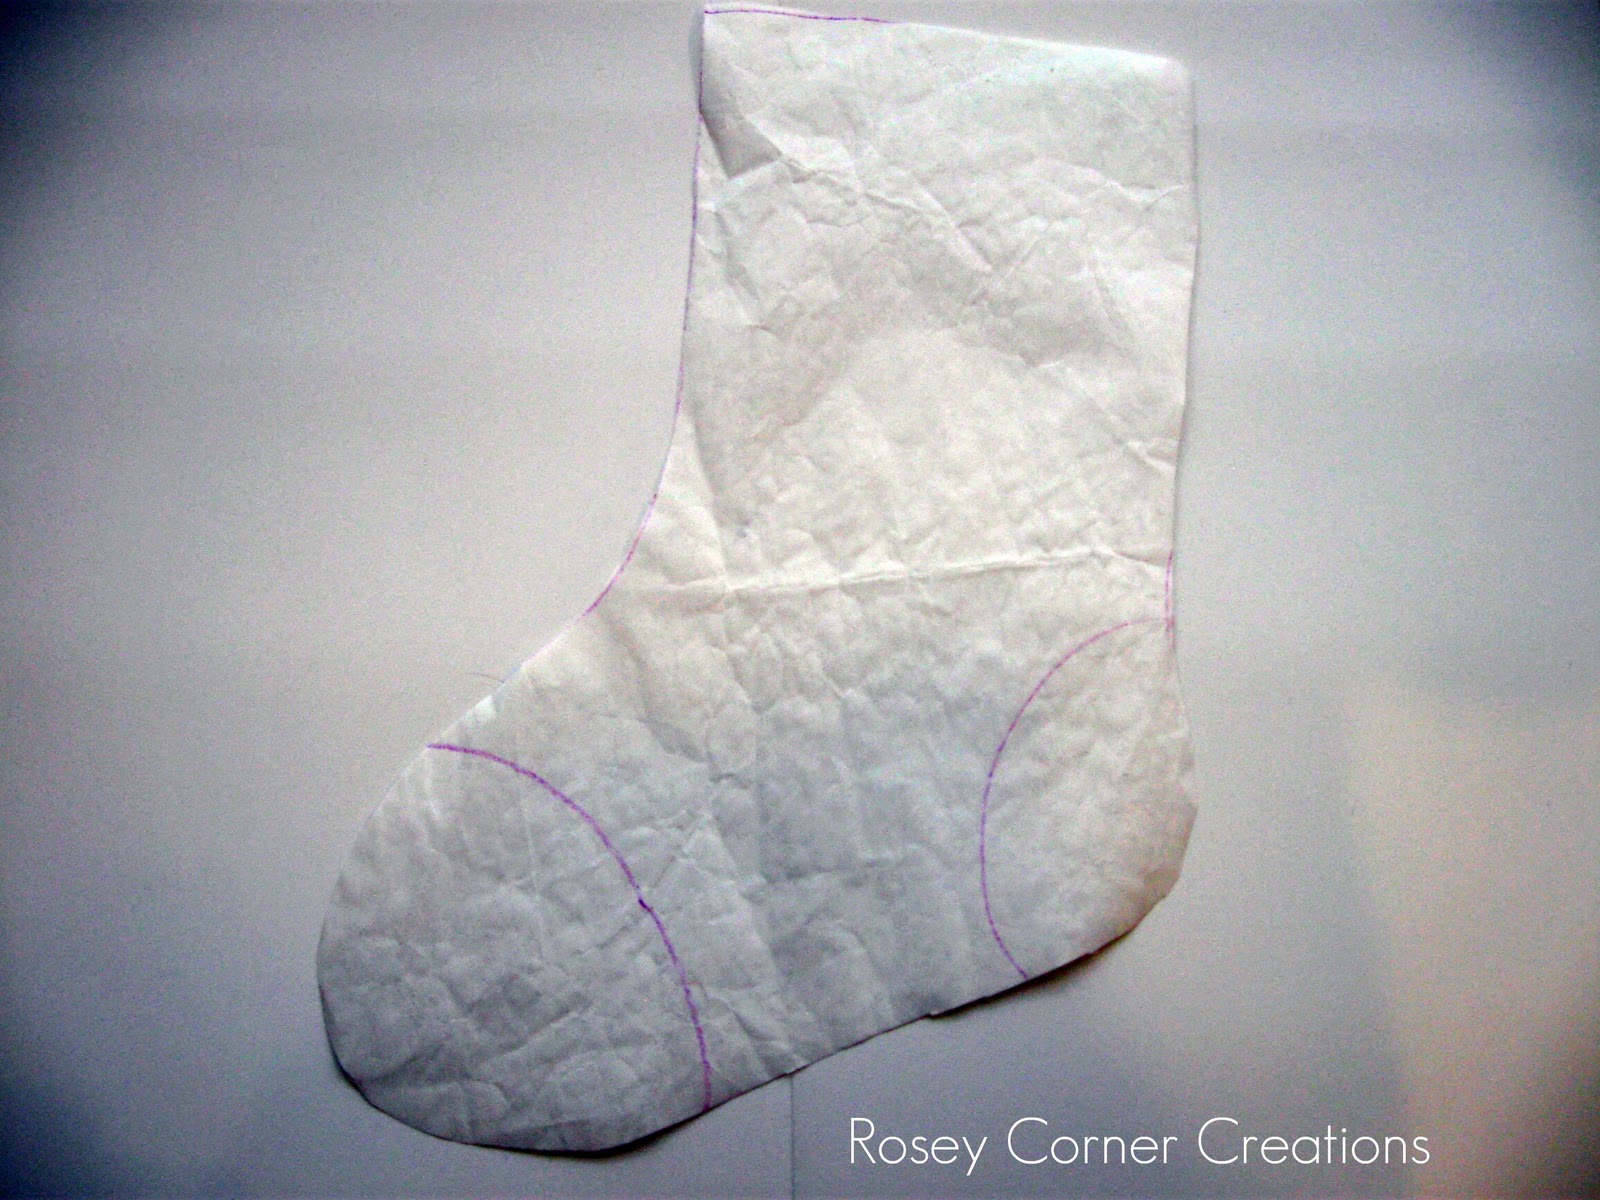
This is my original pattern I made 6 years ago by tracing a stocking on to freezer paper.
It still works really well.

Cut two of your stocking pattern from the quilted lining fabric and two from the main fabric.

For example;
The top of my stocking pattern measures 8 inches, both sides together would equal 16 inches.
This is where it gets a bit tricky.
I'm using a 1/4 seam allowance.
I want one piece of fabric that will wrap around the top of the stocking and become the cuff.
I only want one seam, so, to figure out how long my fabric needs to be I take the total length (16 inches) and subtract one side seam (1/4 + 1/4 = 1/2 inch) = the cuff needs to be 15 1/2 inches long.
I'll write an equation for you.
a = the measurement of one side
b = the seam allowance
c = how long to cut the cuff.
(a+a) - (b+b) = c
Here's another example with numbers, one side of the stocking measures 10 inches.
(10+10) - (1/4+1/4)=
20 - 1/2 = 19 1/2 cut the cuff this long
There's your math for the day. Do I have you completely confused yet?
**I cut the cuff 15 1/2 x 9 inches.
**For the loop cut 4 x 9 inches.
(if you have any questions leave a comment or email me.)
Lets move on.

Pin the main stocking pieces and the lining pieces right sides together.


Trim off the excess seam allowance on the stocking lining. I trimmed to a scant 1/8 inch.

Clip the curves of the main stocking. Be careful not to clip through the stitching.
Clipping the curves will allow your stocking to lay flat and smooth when you turn it right side out.

Turn the main stocking piece right side out.
Use your hand to push out curves and smooth the stocking.
You can press if you'd like.

Leave the stocking lining wrong side out and slide it into the main stocking piece.
Again, use your hand down inside of the stocking to smooth curves and match seams.

Pin the top raw edges together.
Make sure to match both seams.


Working with the loop fabric (9 x 4 inch rectangle), fold in half length-wise and press, then fold raw edges into the center fold and press again. The raw edges should be sandwiched in the middle of the folded fabric.
Sew down each long side of the fabric.
Your loop piece should now measure close to 1 x 9 inches.


Fold the loop fabric in half matching raw edges.
Pin on the inside of your stocking centered on the seam that is directly up from the heal of the stocking.
Do not match the edge with the raw edge of the stocking but leave the loop raw edge up about 1/2 inch.(see above picture)


Working with the cuff rectangle (15 1/2 x 9 inches), fold in half right sides together and match the 9 inch edges.
Sew along the 9 inch edge using your pre-determined seam allowance.
Press open the seam.

Fold in half again, wrong sides together, make sure to keep the seams together as well.

Press the cuff.

Pin the cuff on the inside of the stocking, match raw edges.

The cuff seam should line up with the back heal seam of the stocking where the loop is.
Sew along the top raw edge of the stocking all of the way around.
Don't forget to back stitch at the beginning and the end.
You can finish the raw edges if you'd like either by using a serger or a zig-zag stitch.
I forgot to finish off mine but it will be okay either way.

Pull the cuff up and out of the stocking.

Pin the loop up and to the cuff.

On the outside press the seam allowance down and toward the stocking.

Sew all the way through the seam allowance and the lining close to the original seam but on the raw edge side of the seam.
This is called understitching and will keep the cuff from rolling back up.

This is what the understitching looks like from the lining side.
Fold the cuff down and you're finished!
A basic holiday stocking that you made all by yourself!

Now you can give it to your little one who's been waiting 5 whole years to have a stocking that matches her brothers and sister's stockings and see her smile of appreciation and feel pretty darn good about yourself.

Well, better late than never! Right?
Please let me know if you have any questions!
Good luck!

No comments:
Post a Comment